*FYI - this post may contain affiliate links, which means we earn a commission at no extra cost to you if you purchase from them. Also, as an Amazon Associate I earn from qualifying purchases. Check out our Privacy Policy and Disclosure. for more info.
Let’s be honest: if you’re like many Twitter users, your feed is 90% ‘messy trainwreck’ 100% of the time.
BUT, one of the most beautiful things about Twitter (vs other platforms) is that they give you an easy way to wade through the messy feed monster that you’ve created for yourself…
Say hello to Lists!
The lists feature is probably one of THE most underrated tools in the Twitter world. With it, you can declutter your feed, find content to share much easier and make your mid-lunch Twitter binges just a tad more enjoyable. Here’s an easy tutorial on how to get them set up. Don’t worry, they’re absurdly easy.
Step 1 – Think of a few different lists you might want.
The awesome thing about lists is that they can be public OR private, which means nobody needs to see them unless you want them to.
There are plenty of situations where lists can come in handy. Let’s say you want an easy way to find good content to share or retweet. You could create a list with your favourite bloggers, news sources, websites, etc. which allows you to quickly curate and schedule tweets for that week.
Or, let’s say you want to build a stronger relationship with your readers or customers. You could create a list with some of your most ‘devoted’ followers and then periodically go in to engage with their content.
There are so many possibilities – try not to go crazy 😉
So, for this first step, brainstorm a few of the different lists that you could make use of. One consideration is whether you want the lists to be public or private. Public lists can be followed by other people, so this might be handy if you want to become known as a curator or authority in a certain topic. Otherwise, a private list might serve your needs better (and you can then feel free to make/categorize your lists however your little heart desires!)
Step 2 – Create your lists.
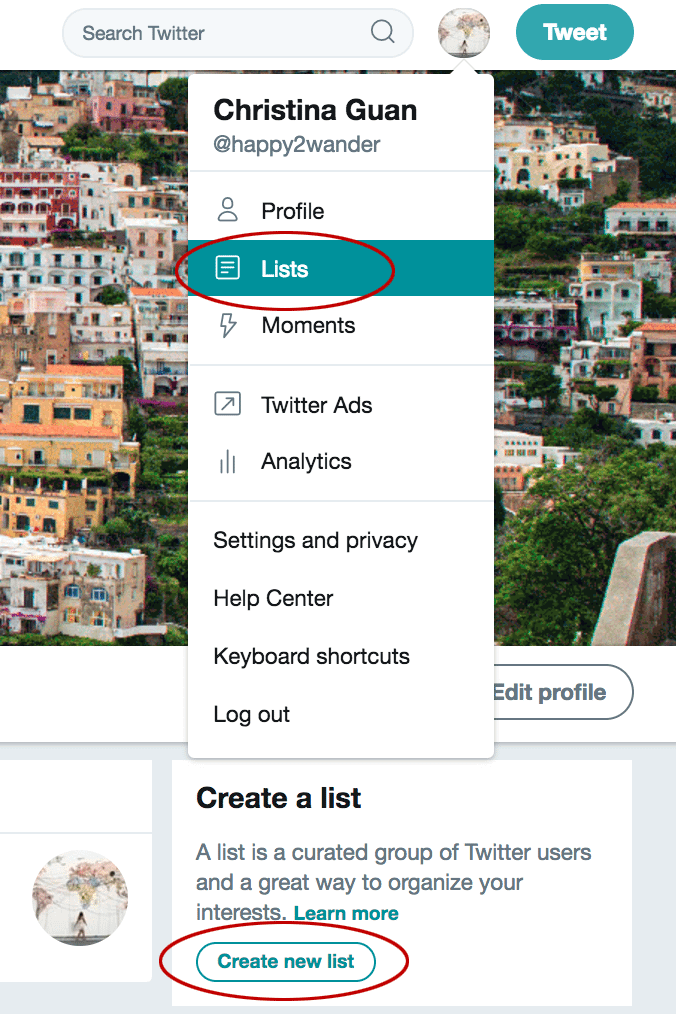
To access your lists, click your profile image on the upper right corner of the screen (to access your settings). Pressing on ‘Lists’ will open up your ‘lists area’. On the right side will be a clear section that says ‘Create a list’. Press the ‘Create new list’ button to start the process.
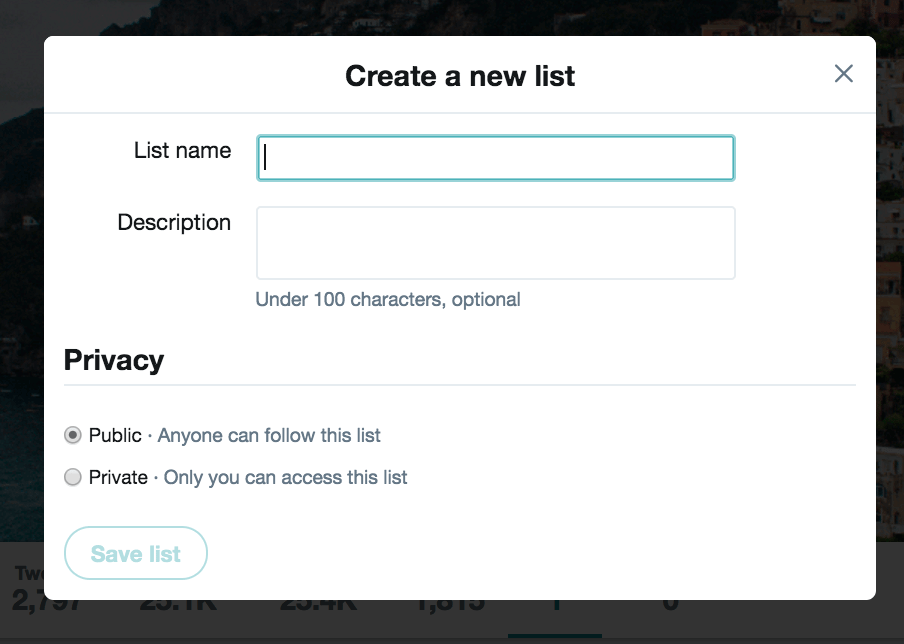
Give your list a name and a description if you wish. I like to use more practical list names like ‘Favourite Travel Bloggers’ or ‘News Sources’ so that it’s easy to remember its purpose (rather than something like BBSparkleSquad) but it’s up to you! Remember to check off whether you want the list to be public or private.
Step 3 – Go to the profiles that you want to add to lists.
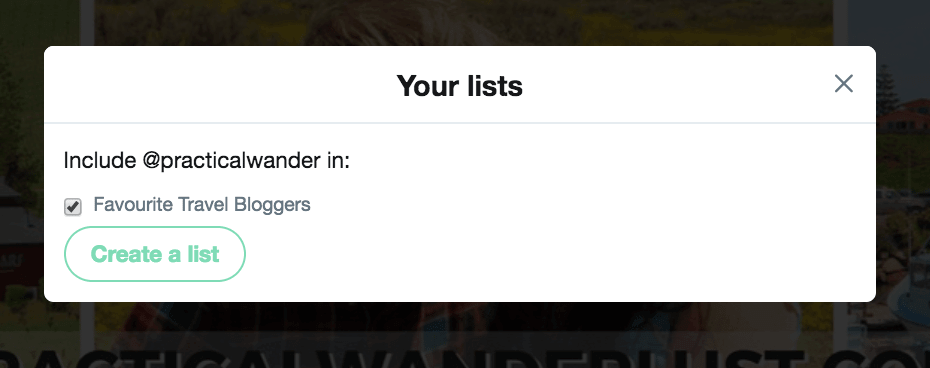
Now that you have your different lists set up, it’s time to fill them up! For this to be as narcissistic as possible, I’ll demonstrate by adding Lia onto a list called ‘Favourite Travel Bloggers’.
So, head to the profile of your ‘list person’, click on the three dots next to ‘Following’, then press ‘Add or remove from lists’.

Then simply check off which list you want them to be a part of.
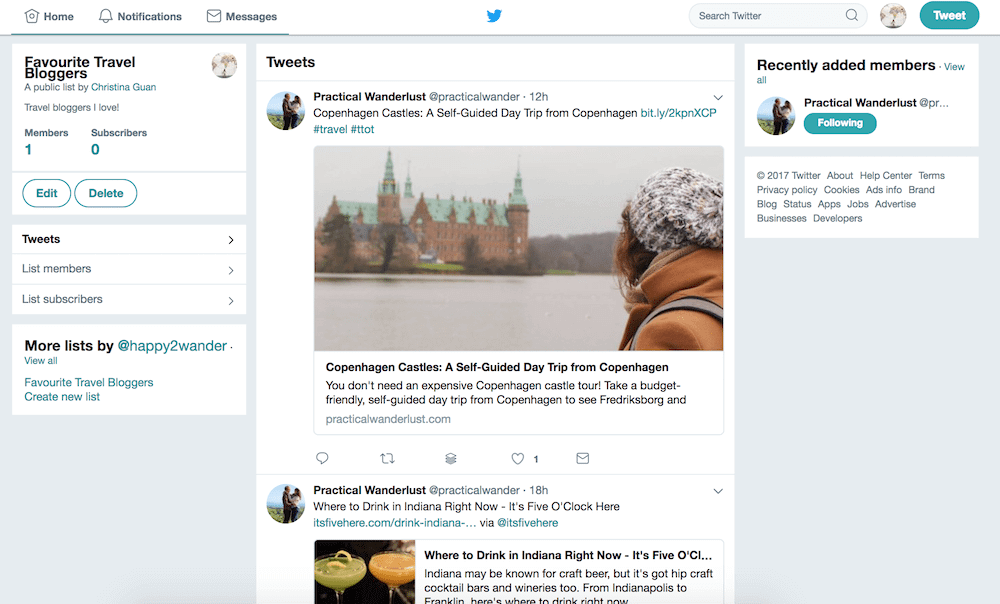
Step 4 – Scroll happily through your clean new feeds.
After you fill your lists up with people, you can now happily browse through them independently in search of awesome content!
See? Told you it was absurdly easy. Now pat yourself on the back and treat yo’self for being such a badass guardian of knowledge.
Do you have any questions about Twitter lists? Drop them below!
Liked this article? Pin it for later!